
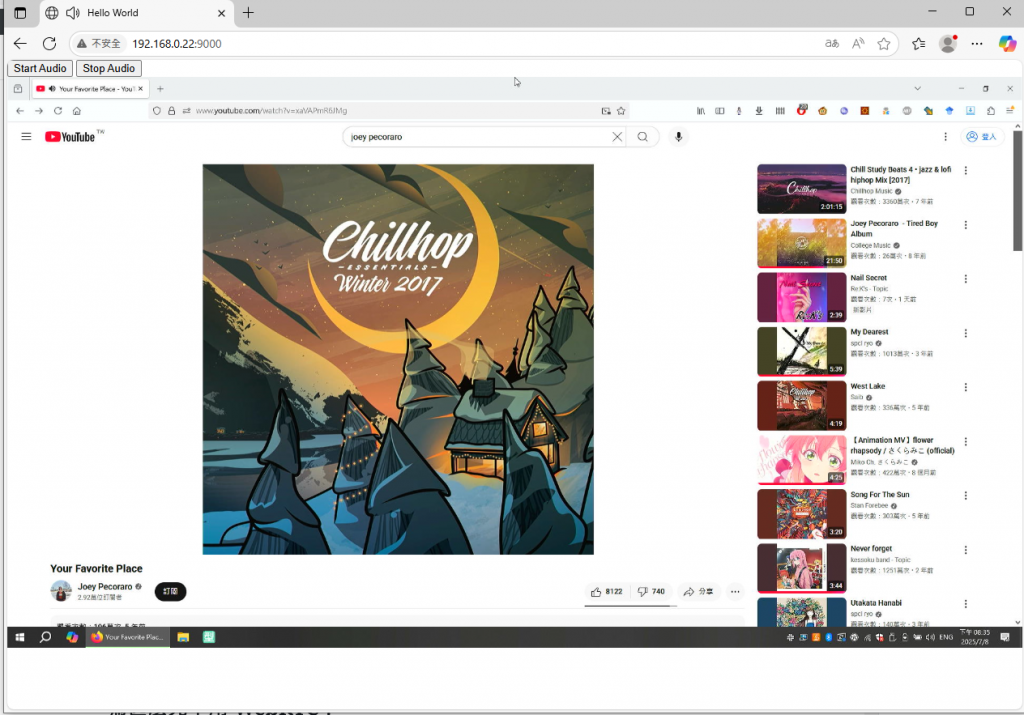
最近因為在開發 RemdesKVM (一套開源的 IP-KVM 裝置),所以需要想辦法在 Linux 下把 USB HDMI capture card 的 audio stream 串流到 Web UI。聽上去好像很簡單,但是想不到實際上做起來一點也不容易(
為甚麼先不用 WebRTC?
如果你跟一個現代的 Web Developer 講這功能,他第一時間回覆你的當然就是 WebRTC 了。WebRTC 是一種基於 UDP 的技術,容許 Server 跟 Client 之間透過 UDP 進行 real-time communication & streaming。那也是因為 UDP 的關系,所以 packet 就是送出去就不理了,自然就不會有太大的 latency 問題。然而使用 WebRTC 協議會出現兩個問題:
- HTTP 是基於 TCP,因此如果本身你已經有整套 HTTP proxy / routing infrastructure,使用 UDP 就要額外再增加一套 proxying services (雖然 Zoraxy 跟 NPM 之類的都有 build-in 就是了)
- WebRTC 需要 opus (然後 opus 沒有 go native 的 encoder implementation)
所以這裡我先使用了基於 websocket 的方案,之後有空再來弄 WebRTC 的方案。
Alsa 與 Linux Audio Device
在真正講到怎樣串流之前,先講一下我怎樣從 USB HDMI device 抓出 PCM data。簡單來說在 Linux 裡面 everything is a file,所以自然地你可以從 /dev/snd/ 裡面其中一個裝置抓到你需要的 PCM 資料。我這裡用的是 arecord 工具,可以透過以下指令安裝:
sudo apt install alsa-utils之後就是透過 -l 指令列出所有 Audio device
$ arecord -l
**** List of CAPTURE Hardware Devices ****
card 0: sofhdadsp [sof-hda-dsp], device 0: HDA Analog (*) []
  Subdevices: 1/1
  Subdevice #0: subdevice #0
card 0: sofhdadsp [sof-hda-dsp], device 6: DMIC (*) []
  Subdevices: 1/1
  Subdevice #0: subdevice #0
card 0: sofhdadsp [sof-hda-dsp], device 7: DMIC16kHz (*) []
  Subdevices: 1/1
  Subdevice #0: subdevice #0
card 1: MS2109 [MS2109], device 0: USB Audio [USB Audio]
  Subdevices: 0/1
  Subdevice #0: subdevice #0
這裡可以看到,我在用的 USB HDMI capture device 是基於 MS2109 的超便宜 capture card。它的位置就是 card 1, subdevices 0。然後我們就是要測試看看它是不是真的能夠 capture 到 audio data。
根據這顆 IC 的 datasheet,我們知道這個裝置支援 48kHz 2 channel audio 的 sampling rate,這個時候可以用這個指令來採集裝置的 capture audio 到 test.wav (注:按 Ctrl + C 停止並儲存)
arecord -D hw:1,0 -f S16_LE -r 48000 -c 2 test.wav然後如果你在被 capture 的裝置上播放音樂,這段音樂便會出現在被 capture 的 test.wav 檔內。這裡為了方便 Golang 自動抓正確的 audio device 我寫了個這樣的 filter function 來直接給我產生需要的 “hw:1,0” parameter
// FindHDMICaptureCard searches for an HDMI capture card using the `arecord -l` command.
func FindHDMICapturePCMPath() (string, error) {
	out, err := exec.Command("arecord", "-l").Output()
	if err != nil {
		return "", fmt.Errorf("arecord -l failed: %w", err)
	}

	lines := strings.Split(string(out), "\n")
	for _, line := range lines {
		lower := strings.ToLower(line)
		if strings.Contains(lower, "ms2109") || strings.Contains(lower, "ms2130") {
			// Example line:
			// card 1: MS2109 [MS2109], device 0: USB Audio [USB Audio]
			parts := strings.Fields(line)
			var cardNum, devNum string
			for i := range parts {
				if parts[i] == "card" && i+1 < len(parts) {
					cardNum = parts[i+1][:1] // "1"
				}
				if parts[i] == "device" && i+1 < len(parts) {
					devNum = strings.TrimSuffix(parts[i+1], ":") // "0"
				}
			}

			if cardNum != "" && devNum != "" {
				return fmt.Sprintf("/dev/snd/pcmC%vD%vc", cardNum, devNum), nil
			}
		}
	}

	return "", fmt.Errorf("no HDMI capture card found")
}

// Convert a PCM device name to a hardware device name.
// Example: "pcmC1D0c" -> "hw:1,0"
func pcmDeviceToHW(dev string) (string, error) {
	// Regex to extract card and device numbers
	re := regexp.MustCompile(`pcmC(\d+)D(\d+)[cp]`)
	matches := re.FindStringSubmatch(dev)
	if len(matches) < 3 {
		return "", fmt.Errorf("invalid device format")
	}
	card := matches[1]
	device := matches[2]
	return fmt.Sprintf("hw:%s,%s", card, device), nil
}
在 Golang 抓取 PCM data
這個部分就比較直接了。既然我們已經知道了這個指令會輸出 PCM data,這個時候我們只要把它透過把 STDOUT PIPE 到 golang 的一個 buffer 內不就可以了嗎?所以就有了以下這段 code
// Start arecord with 48Hz, 16-bit, stereo
	cmd := exec.Command("arecord",
		"-f", "S16_LE", // Format: 16-bit little-endian
		"-r", fmt.Sprint(i.Config.AudioConfig.SampleRate),
		"-c", fmt.Sprint(i.Config.AudioConfig.Channels),
		"-D", hwdev, // Use the hardware device
	)

	stdout, err := cmd.StdoutPipe()
	if err != nil {
		log.Println("Failed to get arecord stdout pipe:", err)
		http.Error(w, "Internal Server Error", http.StatusInternalServerError)
		return
	}

	if err := cmd.Start(); err != nil {
		log.Println("Failed to start arecord:", err)
		http.Error(w, "Internal Server Error", http.StatusInternalServerError)
		return
	}

	reader := bufio.NewReader(stdout)
	bufferSize := i.Config.AudioConfig.FrameSize * i.Config.AudioConfig.Channels * i.Config.AudioConfig.BytesPerSample
	log.Printf("Buffer size: %d bytes (FrameSize: %d, Channels: %d, BytesPerSample: %d)",
		bufferSize, i.Config.AudioConfig.FrameSize, i.Config.AudioConfig.Channels, i.Config.AudioConfig.BytesPerSample)
	buf := make([]byte, bufferSize*2)

for {
n, err := reader.Read(buf)
			if err != nil {
				log.Println("Read error:", err)
				if i.audiostopchan != nil {
					i.audiostopchan <- true // Signal to stop the audio pipe
				}
				break;
			}
log.Println("Read bytes ", n)
}
這裡先很快的解釋一下這個 buffer 大小的原因,以下是預設的 AudioConfig
AudioConfig{
		SampleRate:     48000,
		Channels:       2,
		BytesPerSample: 2,    // 16-bit
		FrameSize:      1920, // 1920 samples per frame = 40ms @ 48kHz
	}
這裡定義了使用 48khz sampling rate,2 audio channel (Left & Right) 和 16bit PCM 的 byte size (2bytes),而 frame size 則是我們要 sample 多久。這個 framesize 會決定我們先 sample 多少 ms 再把它包起來送出去,這個數值越大,latency 便會越高但是數據傳輸的 overhead (如 header、checksum 等)便會越小;而數值越小 latency 便會越低,latency 會變小但是 overhead 就會變多。所以一般在 embedded system 的環境下,多數都是採用 40ms frame 為標準,但是像 Bluetooth Low latency audio 之類的環境下,有時候會用到 10ms frame。
之後就是要計算採集 buffer 的大小,這裡使用 frame 數量 x channel 數量 x bytes per sample 來計算。當然如果你想一次讀取多個 frame 也可以把這個 bufferSize *= n 以減少 overhead
bufferSize := i.Config.AudioConfig.FrameSize * i.Config.AudioConfig.Channels * i.Config.AudioConfig.BytesPerSample透過 WebSocket 傳送 PCM Data 到 Web UI
這個便沒甚麼特別了,只是單純的把讀取出來的 PCM bytes 塞到 websocket 而已。這裡的 example 採用 gorilla websocket packet 的 binary 模式來傳。 只要把 for loop 裡面改成這樣便可以了。
n, err := reader.Read(buf)
			if err != nil {
				log.Println("Read error:", err)
				if i.audiostopchan != nil {
					i.audiostopchan <- true // Signal to stop the audio pipe
				}
				goto DONE
			}

			if n == 0 {
				continue
			}

			//log.Println("Read bytes:", n, "size of buffer:", len(buf))
			//Send only the bytes read to WebSocket
			err = conn.WriteMessage(websocket.BinaryMessage, buf[:n])
			if err != nil {
				log.Println("WebSocket send error:", err)
				goto DONE
			}

//DONE 來處理一些 clean up 的東西
前端 Render PCM data
前端在收到 WebSocket 資料後要 render PCM data,這個時候便會需要用上 Audio Context API。這個 API 在 Firefox 上速度有夠慢,所以基本上只有 Chrome 才能流暢播放 audio stream。
建立 WebSocket
這個與一段的 websocket 差不多,就是需要把 binaryType 從預設的 blob 改成 arraybuffer
audioSocket = new WebSocket(audioSocketURL);
audioSocket.binaryType = 'arraybuffer';

 audioSocket.onopen = function() {
                console.log("Audio WebSocket connected");
                if (!audioContext) {
                    audioContext = new (window.AudioContext || window.webkitAudioContext)({sampleRate: 24000});
                }
            };
然後在 onmessage event 接收 PCM data。這個時候的 PCM data 還是它原本的狀態(16bit PCM integer),但是 Audio Context 吃的是 Float32 array(range -1 到 1),所以我們需要先把 PCM bytes 換成 Float32 array 才送進 Audio context render buffer。為了避免卡到 render routine,我這裡選擇在接收到的時候先轉換再推進 render queue 內。
  const MAX_AUDIO_QUEUE = 4;
  audioSocket.onmessage = function(event) {
      if (!audioContext) return;
      let pcm = new Int16Array(event.data);
      if (pcm.length === 0) {
          console.warn("Received empty PCM data");
          return;
      }
      if (pcm.length % 2 !== 0) {
          console.warn("Received PCM data with odd length, dropping last sample");
          pcm = pcm.slice(0, -1); // Drop last sample if odd length
      }
      // Convert Int16 PCM to Float32 [-1, 1]
      let floatBuf = new Float32Array(pcm.length);
      for (let i = 0; i < pcm.length; i++) {
          floatBuf[i] = pcm[i] / 32768;
      }
      // Limit queue size to prevent memory overflow
      if (audioQueue.length >= MAX_AUDIO_QUEUE) {
          audioQueue.shift(); // Remove oldest audio buffer if queue is full
      }
      audioQueue.push(floatBuf);
      if (!audioPlaying) {
          audioPlaying = true;
          playAudioQueue();
      }

  };
至於要播放的時候便會需要到這個 playAudioQueue 內的 function。這個 function 也是簡單直接的
- 從 audioQueue shift 一個 sample 出來
- frame count 是我們在接收的時候轉換的 Float32 buffer 的一半長度(因為有兩個 audio channel,Left + Right)
- 然後我們建立一個 audio context 的 2 channel buffer,sampling rate 是 48kHz
- 最後讓 audioContext render 它出來
- 完成 playback 後再 call 一次 playAudioQueue() 來播放下一個 PCM frame
function playAudioQueue() {
    if (!audioContext || audioQueue.length == 0) {
        audioPlaying = false;
        return;
    }
    let floatBuf = audioQueue.shift();
    let frameCount = floatBuf.length / 2;
    let buffer = audioContext.createBuffer(2, frameCount, 48000);
    for (let ch = 0; ch < 2; ch++) {
        let channelData = buffer.getChannelData(ch);
        for (let i = 0; i < frameCount; i++) {
            channelData[i] = floatBuf[i * 2 + ch];
        }
    }
    let source = audioContext.createBufferSource();
    source.buffer = buffer;
    source.connect(audioContext.destination);
    source.onended = playAudioQueue;
    source.start();
}
可是這樣的 Implementation 有一個小 bug,就是在每個 40ms frame 之間,你可以聽到明顯的卡了一下。這個卡一下是因為每次 playAudioQueue 它都要先 allocate memory、decompose PCM bytes (那個 for-loop)然後才能 start。所以為了 optimize 這個 implementation,我們可以加一個 scheduling 的邏輯進去讓它一進來馬上排進去 render queue,並預先安排好 start audio render 的時間。
let scheduledTime = 0;

function scheduleAudioPlayback() {
    if (!audioContext || audioQueue.length === 0) return;

    // Use audioContext.currentTime to schedule buffers back-to-back
    if (scheduledTime < audioContext.currentTime) {
        scheduledTime = audioContext.currentTime;
    }

    while (audioQueue.length > 0) {
        let floatBuf = audioQueue.shift();
        let frameCount = floatBuf.length / 2;
        let buffer = audioContext.createBuffer(2, frameCount, 48000);
        for (let ch = 0; ch < 2; ch++) {
            let channelData = buffer.getChannelData(ch);
            for (let i = 0; i < frameCount; i++) {
                channelData[i] = floatBuf[i * 2 + ch];
            }
        }
        let source = audioContext.createBufferSource();
        source.buffer = buffer;
        source.connect(audioContext.destination);
        source.start(scheduledTime);
        scheduledTime += buffer.duration;
    }
}
}
而 audio websocket 的 onmessage 的部分改成這樣 (Queue 增加了一點讓它更流暢)
const MAX_AUDIO_QUEUE = 8;
audioSocket.onmessage = function(event) {
    if (!audioContext) return;
    let pcm = new Int16Array(event.data);
    if (pcm.length === 0) {
        console.warn("Received empty PCM data");
        return;
    }
    if (pcm.length % 2 !== 0) {
        console.warn("Received PCM data with odd length, dropping last sample");
        pcm = pcm.slice(0, -1);
    }
    // Convert Int16 PCM to Float32 [-1, 1]
    let floatBuf = new Float32Array(pcm.length);
    for (let i = 0; i < pcm.length; i++) {
        floatBuf[i] = pcm[i] / 32768;
    }
    // Limit queue size to prevent memory overflow
    if (audioQueue.length >= MAX_AUDIO_QUEUE) {
        audioQueue.shift();
    }
    audioQueue.push(floatBuf);
    scheduleAudioPlayback();
};
就是這樣,一個基於 WebSocket 傳輸 PCM 到 front-end 進行 render 的系統就寫好了!